Introduction to Spring Framework 6 HTTP interfaces
Introduction
The Spring Framework version 6, along with (Spring Boot version 3) will introduce the ability to consume HTTP
apis in a declarative way using interfaces. This feature resembles the Spring Data way of writing repositories, where we
just create an interface and declare what methods it should have and Spring Data will create a proxy, implementing all
SQL queries.
It’s worth pointing out that Spring Framework 6 is still in the snapshot state and the current article reflects the
state of the things as they are in June 2022. It’s likely that the API will suffer some changes.
The REST API
Let’s look at the REST API we’ll consume. It’s a simple API returning Chuck Norris quotes. To retrieve a random quote,
we can call the following endpoint:
|
|
And the response payload will look like this:
|
|
Let’s create a Spring Boot application which will consume this REST API.
Creating a Spring Boot 3 project
In order to use HTTP interfaces, we need to create a Spring Boot 3 project (which used Spring Framework 6 used the hood). For that, let’s go to the start.spring.io.
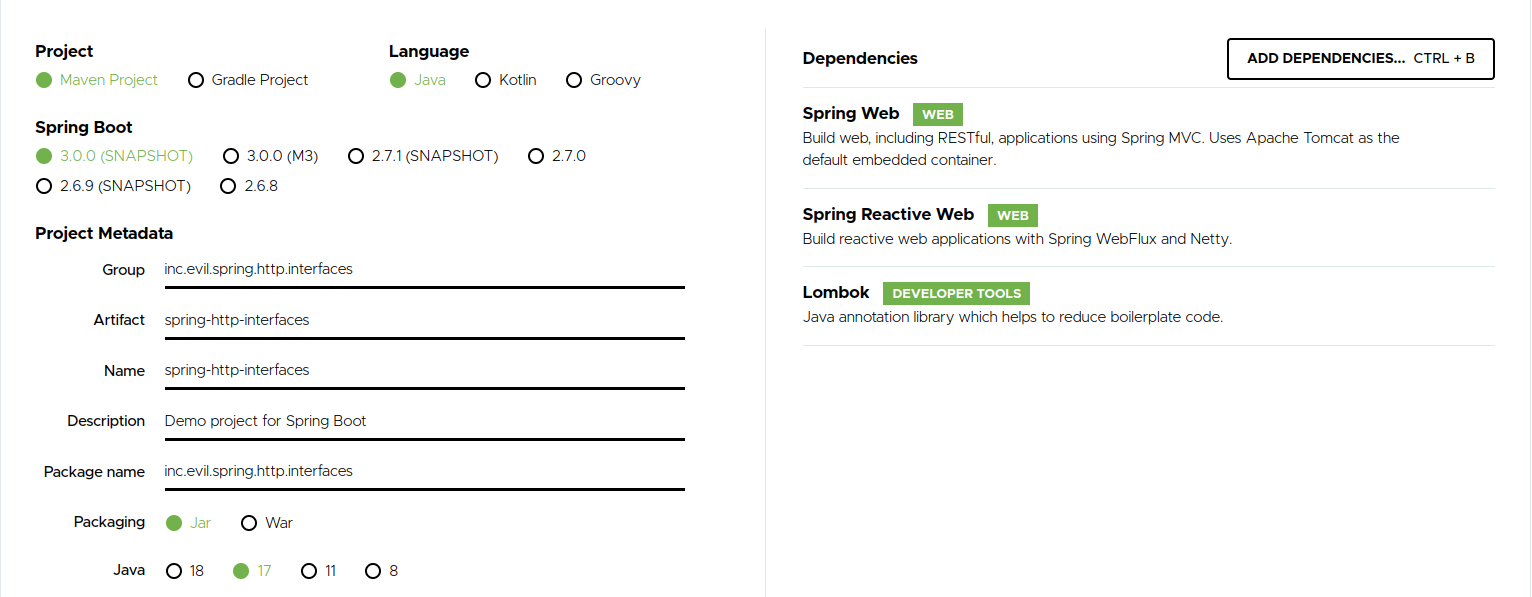
We’ve selected Spring Boot 3, Spring Web and Spring Reactive Web modules. We need Spring Reactive Web to obtain the
WebClient since that’s what HTTP interfaces are based on. RestTemplate is not supported at the moment, and most likely it won’t
be supported since the Spring team recommends using WebClient in new projects.
Consuming the REST API
We’ll create the following DTO which will be the Java representation of the JSON response.
|
|
Now, let’s create the HTTP interface:
|
|
When it comes to HTTP interfaces method return types we can use the ResponseEntity if we want access to HTTP headers and status code for example.
When also reactive types like Mono and Flux, which are supported as well.
Using the @GetExchange("/jokes/random") annotation, we specify that we want an HTTP GET request executed to the /jokes/random endpoint.
There are also other annotations, for the rest of HTTP methods like:
@PostExchange: for HTTP POST method. The HTTP interface method parameter representing the request payload should be annotated with the@RequestBodyannotation@PutExchange: for HTTP PUT method@PatchExchange: for HTTP PATCH method@DelectExchange: for HTTP DELETE method@HttpExchange: the most generic one. All annotations above are meta-annotated with the@HttpExchangeannotation. For example@GetExchange("/jokes/random")is equivalent to@HttpExchange(url = "/jokes/random", method = "GET")
We can also use the @HttpExchange annotation to specify attributes common to all HTTP interface methods (like contentType, accept,
or url prefix), like shown below:
|
|
Moving on. In order to obtain an actual HTTP interface instance, we need to define a spring bean. Instantiation is done by
HttpServiceProxyFactory, which acts as a factory for HTTP interface instances. The bean definition looks like this:
|
|
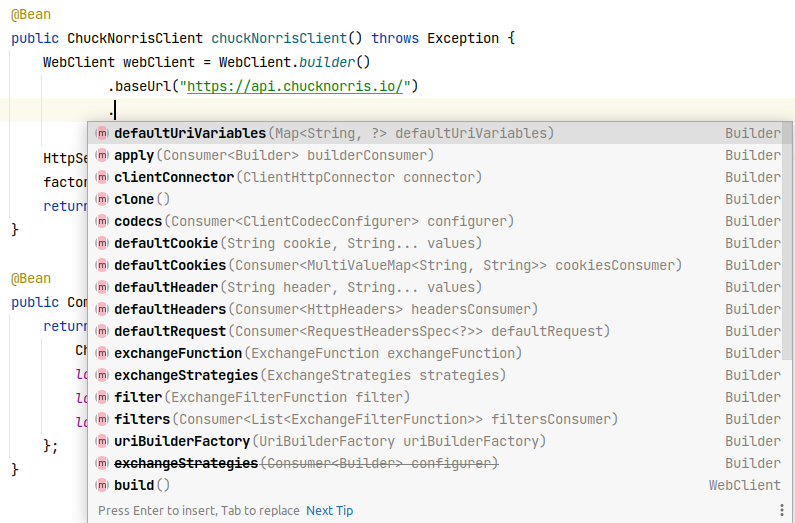
Also notice that we’ve passed the baseUrl to the WebClient builder. We also have the ability to specify default HTTP headers,
query parameters, cookies and things like this. See bellow all the available options:
Now, let’s try to see the HTTP interfaces in action. Let’s run our application:
|
|
Looking at the logs we can see that all 3 HTTP requests executed successfully:
2022-06-04T16:22:17.803+03:00  INFO 1518299 --- [main] .e.s.h.i.SpringHttpInterfacesApplication: Random Chuck Norris quote: ChuckNorrisQuote(value=All science students maybe aware about the fact that picochuck is the unit of manliness in the International System of Units (SI). An average man measures about 0.00073 pc. Chuck Norris measures 39,372 petachucks., url=https://api.chucknorris.io/jokes/IZpNYLTlTTGmDELbcTO-MQ, id=IZpNYLTlTTGmDELbcTO-MQ, iconUrl=https://assets.chucknorris.host/img/avatar/chuck-norris.png, createdAt=2020-01-05 13:42:22.089095, updatedAt=2020-01-05 13:42:22.089095)
2022-06-04T16:22:17.912+03:00  INFO 1518299 --- [main] .e.s.h.i.SpringHttpInterfacesApplication: Categories: [animal, career, celebrity, dev, explicit, fashion, food, history, money, movie, music, political, religion, science, sport, travel]
2022-06-04T16:22:18.014+03:00  INFO 1518299 --- [main] .e.s.h.i.SpringHttpInterfacesApplication: Joke from money category: ChuckNorrisQuote(value=When Chuck Norris played golf for money, chuck marked down a hole in 0 every time, a pro at the golf club, said to Chuck: "excuse me sir, but you cant score zero on a hole". Chuck Norris turned towards the man and said, im Chuck Norris, the man then proceeded to pour gas over his body and set himself on fire because that would be less painful than getting roundhouse kicked by Chuck Norris, Chuck Norris roundhouse kicked him in the face anyways., url=https://api.chucknorris.io/jokes/5cGCv-UkQR6S7HeRjULwyw, id=5cGCv-UkQR6S7HeRjULwyw, iconUrl=https://assets.chucknorris.host/img/avatar/chuck-norris.png, createdAt=2020-01-05 13:42:26.766831, updatedAt=2020-05-22 06:16:41.133769)
Conclusion
In this blog post we’ve looked at Spring 6's HTTP interfaces, which is a declarative way of consuming HTTP APIs,
similar to feign. It is still in the snapshot phase, so it’s likely that the api will
suffer some changes.
One small disadvantage is that HTTP interfaces are based on WebClient and in order to use it, we need to add the whole
spring-boot-starter-webflux maven dependency. It’ll be nice if in the future WebClient will be packaged in a separate Spring starter,
so that the dependency size is minimized.
The example code we used in this article can be found on GitHub.
More documentation can be found here.